

Creating a mood board for a short film’s aesthetic means gathering visual references that define the film’s tone and turn them into a clear direction the team can share. Include images, a color palette, lighting and cinematography references, textures, and details for locations, sets, or wardrobe. Arrange them on a shared canvas and add brief notes explaining the choices.
A strong board is more than a collage of striking frames. It helps the creative team picture how the film should feel and gives each reference a purpose. This guide explains what to include, how to find materials that fit your story, and how to organize them into a cohesive visual language. You’ll also learn how to refine the board into a practical reference for discussing the film’s look before production begins.
Key Takeaways
- Choose colors for the feeling they create, then use a consistent palette to guide choices across wardrobe, sets, and lighting.
- Gather varied visual references, from film stills to paintings, and add notes that explain what each one communicates.
- Anchor the shared canvas with the strongest image, then arrange supporting references by importance and relationship.
- Set the board’s purpose before collecting visuals so it gives collaborators a focused direction for the film’s look.
What is a Filmmaking Moodboard?
A filmmaking mood board is a visual collage that communicates a film’s tone through images, colors, lighting, and textures. It establishes a broad visual direction; a lookbook develops that direction into a presentation, while a shot list specifies planned shots.
-
Select Color Swatches and Palettes
Pull color swatches from images that already match your story’s world. Place them beside references for set design, wardrobe, and locations to see how the colors work together. For example, sample a character’s coat and a room’s wall from reference images. Tie swatches to practical choices rather than including attractive colors that have no place in the film.
-
Connect Colors with Emotional Tone
Choose colors that support the emotion each scene should convey. Bright, saturated colors may suggest happiness, while muted hues may signal sadness. Use the palette to distinguish characters or locations, then compare colors across the board. If a character’s palette changes, make that shift intentional and connect it to their emotional arc.
-
Choose Lighting Cues and Textures
Add images that show the intended lighting, such as sharp shadows, soft light, or a strong directional source. Note what each reference communicates about atmosphere and focus. Pair those cues with textures from surfaces, costumes, or set design. For example, a rough wall beside a tightly lit portrait suggests a different visual world from smooth surfaces under even light.
-
Distinguish Boards, Lookbooks, and Shot Lists
Use the mood board to establish the film’s tone through images, colors, textures, and fonts. Build a lookbook when collaborators need a more developed visual presentation, with references that clarify characters, wardrobe, and locations. Keep the shot list focused on planned shots. Label each document clearly so a cinematography reference isn’t mistaken for a required camera setup.
Gathering visual references
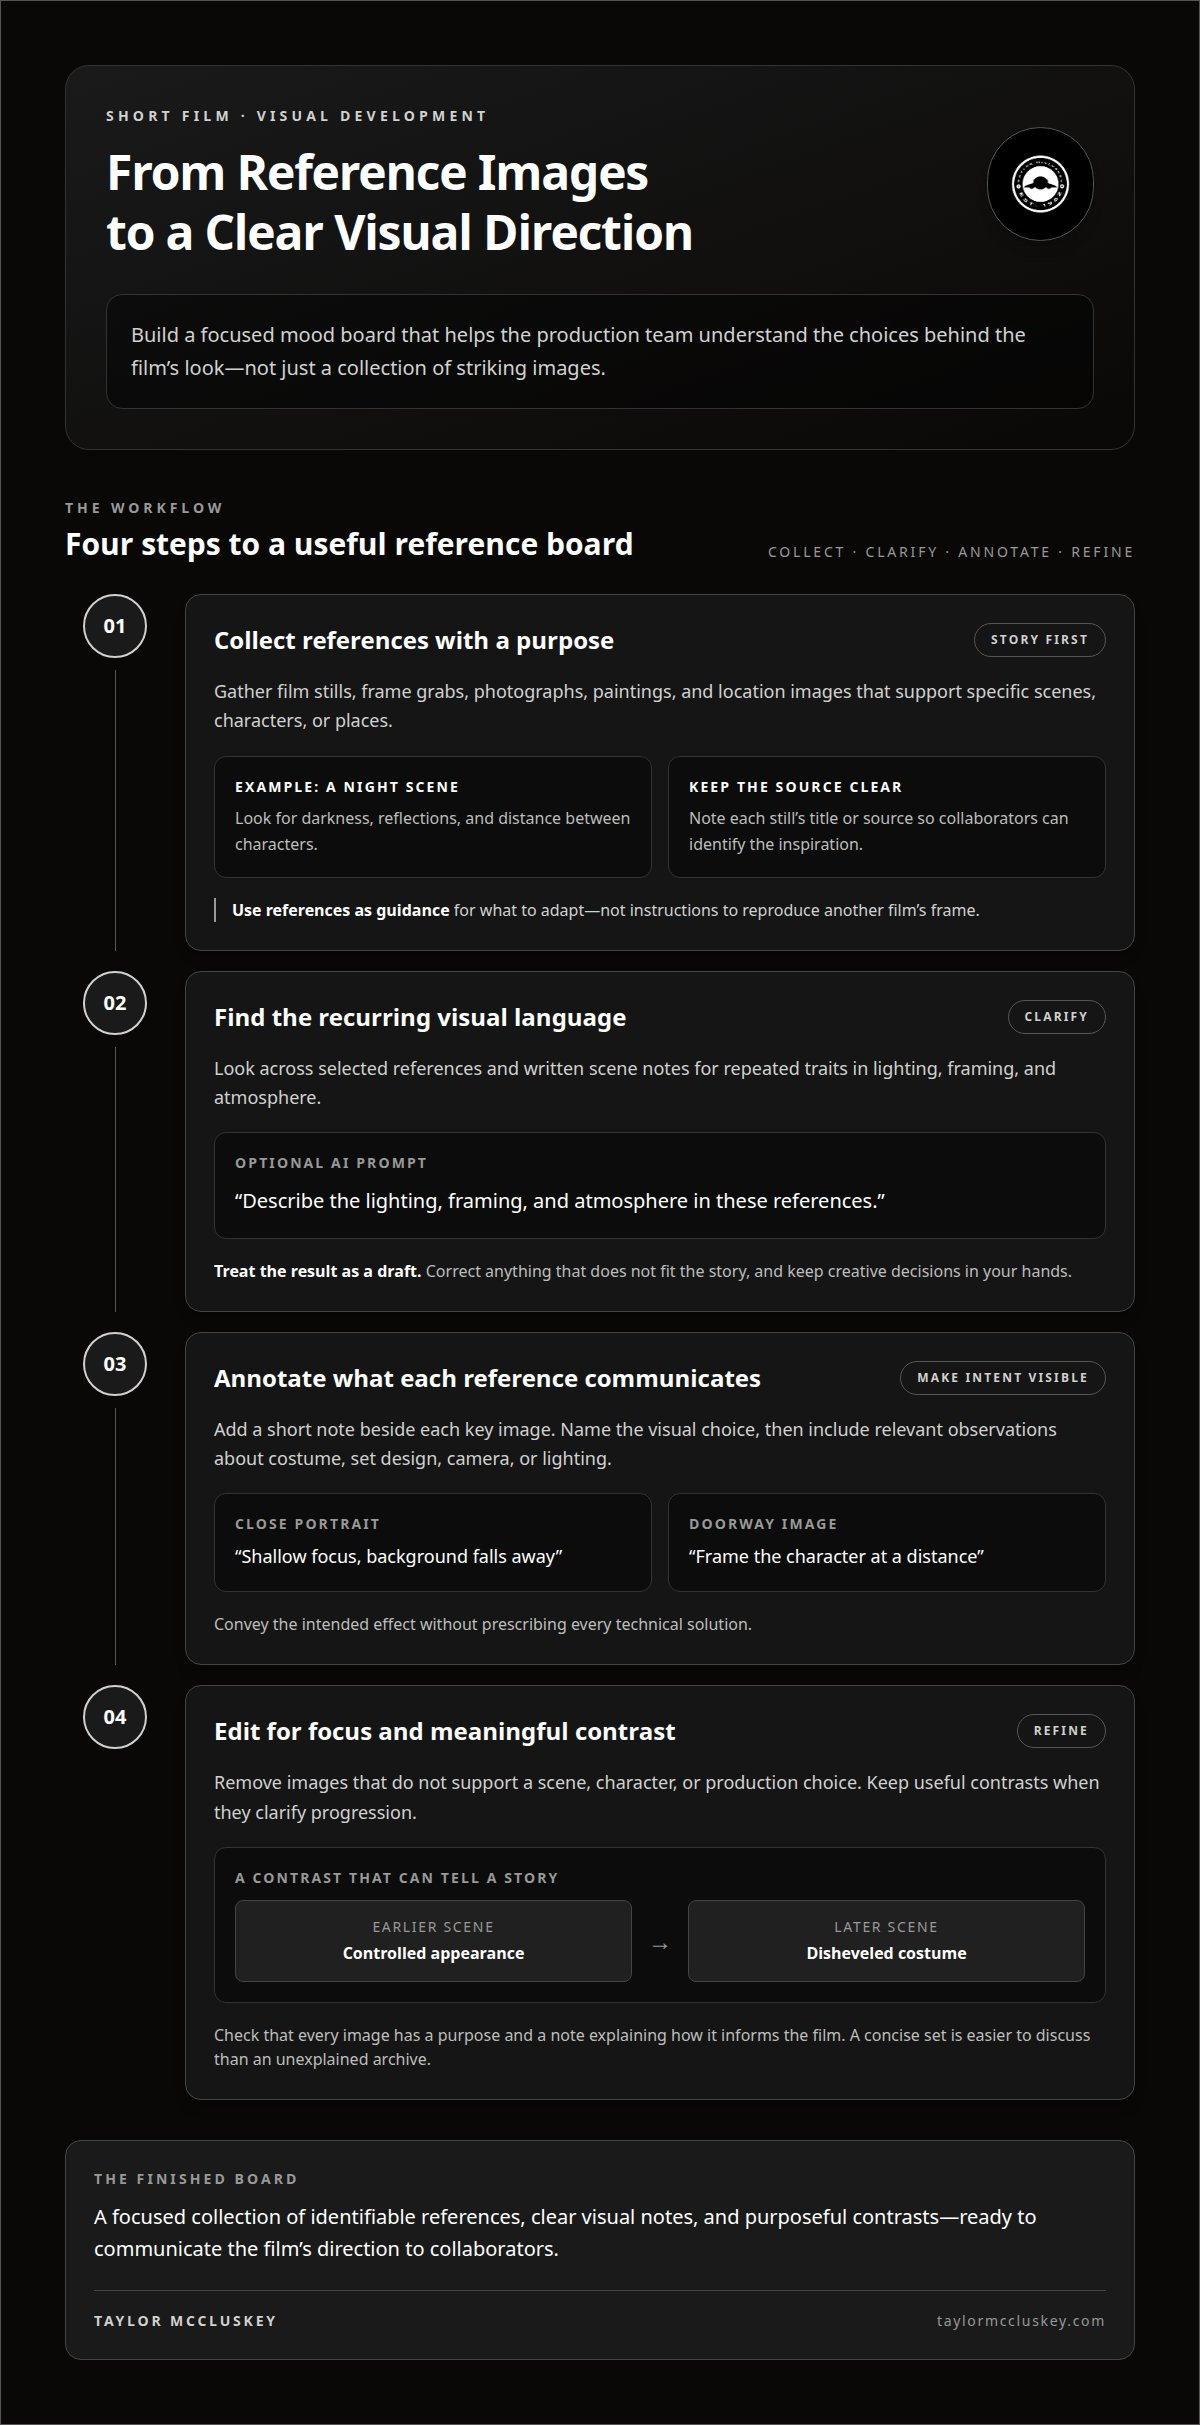
Build a focused collection of references around specific scenes, characters, and locations. Creating a mood board for a short film's aesthetic starts with visuals that help the production team understand deliberate choices, not simply fill the canvas.
- Collect film stills, frame grabs, photographs, paintings, and location images that match the story’s visual direction. For a night scene, look for references showing darkness, reflections, and distance between characters. Note each still’s title or source so collaborators can identify the inspiration and discuss what to adapt. Treat references as creative guidance, not instructions to reproduce another film’s frame.
-
Summarize Visual Direction with AI
Ask an AI assistant to summarize recurring visual traits in your selected references and written scene notes. A prompt such as “describe the lighting, framing, and atmosphere in these references” can help turn a broad collection into clear language. Treat the result as a draft: correct anything that doesn’t fit your story, and keep creative decisions in your hands.
-
Add Visual and Technical Notes
Add a short note beside each key reference to name the choice it communicates. For example, label a close portrait “shallow focus, background falls away” or describe a doorway image as “frame the character at a distance.” Include relevant observations about costume, set design, camera, or lighting. Use the board to convey intent, not prescribe every technical solution.
- Review the collection and remove references that don’t support a scene, character, or production choice. Keep useful contrasts when they clarify progression, such as a character’s controlled appearance in one scene and disheveled costume later. Check that every image has a purpose and a note explaining how it informs the film. A concise set is easier to discuss than an unexplained archive.
When a visual plan needs to connect with production decisions, Taylor McCluskey’s Film Production Services offer a relevant next step.
Arranging references on a shared canvas
Organize the board by scene, location, character, and lighting so collaborators can find each visual direction quickly. Use a shared canvas to group related elements and show how they contribute to a unified vision.
-
Collect Existing Reference Material
Gather photographs, film stills, frame grabs, sketches, and location references that support the project. Add a brief source label and note what each item contributes, such as texture, composition, or atmosphere. Keep references that help define a production choice. Remove duplicates and visuals that distract from a scene’s direction, even if they look striking on their own.
-
Group References by Scene and Location
Create a clearly labeled area for each scene or location, then group the relevant images. For a kitchen conversation, place the room, window light, character positions, and wardrobe references together. Add character names or scene labels so collaborators can follow the story. If a reference applies across several scenes, place it near the shared element and label the connection.
-
Arrange Lighting and Cinematography References
Place lighting and cinematography images beside the scenes they inform. Add concise notes about shadow quality, light direction, framing, or composition. For example, a side-lit portrait can communicate the desired contrast, while a wide frame can show how much space surrounds a character. Make the intended effect clear without treating the reference as a fixed camera instruction.
-
Connect Wardrobe and Character References
Group each character’s wardrobe and physical references, then position them beside the relevant scene clusters. This helps the team see how costume, color, and location work together visually. Use labels to distinguish characters and note meaningful changes, such as a coat removed between scenes. In shared software, preserve the groupings and keep annotations close to the images they explain.
What Are the Key Components of a Mood Board?
A useful mood board starts with a clear purpose and references that serve it. Avoid unrelated images, unclear annotations, and a crowded canvas that obscures the director’s visual direction.
- Define what the board needs to communicate before collecting more material. A pitch board may establish the film’s atmosphere and visual identity. A pre-production board can focus on practical choices for locations, wardrobe, or cinematography. Write a short purpose statement at the top, such as “show the contrast between public confidence and private grief.”
- Choose one primary focus, then add elements that clarify it. A character-led board might center on facial expressions, costume, and color palettes. A location-led board could emphasize architecture, surfaces, and natural light. Include textures or palette samples when they help explain the direction. Don’t combine every idea without showing how the elements connect.
- Choose a format that suits how collaborators will use the board. A physical board works for an in-room review, while a digital canvas lets remote collaborators view and revise references. Tools such as Pinterest, Canva, Adobe Spark, Milanote, and InVision can support digital mood boards. Choose according to whether you need a simple collage, annotations, or a shared workspace.
- Review the board from a collaborator’s perspective before sharing it. Check that every image supports the stated purpose, labels identify scenes or characters, and the color palette feels consistent. Remove repeated references and explain deliberate contrasts. A board that pairs a bright palette with bleak imagery needs context, or viewers may interpret the direction differently.
- Invite focused feedback on a specific decision, such as the palette, tone, or framing. Ask collaborators to identify what communicates clearly and what feels disconnected. Apply useful notes, then arrange the revised board so its visual hierarchy is easy to follow. Develop your film’s visual direction into a production-ready plan.
Taylor McCluskey: Music Albums and Singles
Taylor McCluskey’s film production services can help move a project beyond mood-board planning and into film development. His work across filmmaking and music also makes his music releases relevant when considering how sound and visuals can contribute to a project’s creative direction.
Turn to Taylor McCluskey when you’re ready to discuss a film project beyond the mood board. The board can help communicate your intended tone and visual direction as you consider the next creative steps.
To discuss a project, contact Taylor McCluskey or visit taylormccluskey.com.
Carry Your Visual Direction Into Production
Creating a mood board for a short film’s aesthetic gives your ideas a form the team can discuss. As the project develops, use it to guide decisions. Treat the board as a living creative document: update references when the story changes and record the reasons behind major visual shifts. This keeps new choices connected to the film’s original intent without freezing the creative process.
Before moving forward, identify the unresolved decisions that matter most. Is the emotional tone clear? Can collaborators distinguish a visual preference from a fixed production requirement? A focused conversation about those points can make the board a stronger foundation for the work ahead.
When you’re ready to explore the next stage of your film project, contact Taylor McCluskey. Keep refining your vision, and let each deliberate choice bring the film closer to the screen.
Frequently Asked Questions
What is a mood board for a short film, and what should it include?
A short film mood board is a shared visual guide for discussing the film’s intended look. Include references tied to key story decisions, such as a protagonist’s changing appearance or a location’s atmosphere. Add concise labels explaining each image’s role. For a film that shifts from calm to unsettling, contrasting references can make the progression clear.
How do you define a short film's visual aesthetic before making a mood board?
Start with the script’s emotional arc and identify what viewers should notice or feel in important scenes. Write a few descriptive words, such as “intimate,” “restless,” or “clinical,” and test them against specific moments. For a story set in one apartment, decide whether the space feels protective or confining. That choice gives your image search a clear direction.
What images, colors, textures, and typography should a film mood board include?
Choose materials that clarify the film’s world rather than fill empty space. A coastal drama might use weathered surfaces, overcast landscapes, and restrained title lettering; a contemporary comedy could use crisp interiors and playful type. Check that typography supports the intended period and genre. If text is a placeholder, label it so nobody mistakes it for final title design.
What are the best free tools for creating a film mood board?
Free digital apps can work well for boards built from still images, color samples, and notes. Pinterest, Canva, Adobe Spark, Milanote, and InVision are examples of digital mood-board tools. Choose a workspace that makes the relationships between references clear. For instance, a scene-based layout may be easier to review than one long, unsorted image feed.
How do filmmakers find and legally use reference images for a mood board?
Find references in your own photographs, licensed image collections, and materials that explicitly allow your intended use. Keep the creator, source, and usage terms alongside each image. Don’t assume an image found online is cleared for a pitch deck, public presentation, or production document. If a specific image is essential, obtain permission or use a properly licensed alternative.
How do you share a mood board with a short film's director, cinematographer, and production designer?
Share one organized digital canvas or clearly labeled export, then invite each collaborator to respond to the same version. Ask the director to comment on story and tone, the cinematographer on framing and light, and the production designer on locations and physical details. Keep feedback attached to the relevant reference, and mark revisions so the team can distinguish current decisions from earlier ideas.


